| Make the naples.net Google Workspace Email Work with Your Email Program |
IMPORTANT !!!
Beginning March 14, 2025, naples.net Google Workspace will be required to change
email settings to use a modern authorization process called “Oauth2”
instead of just a username and a password setting.
Most modern email client software already has this Oauth2 capability built in,
but account settings on your client software end will have to be changed
in order for your @naples.net email to work. Also the “less secure”
setting which was described below will be eliminated.
If you use Thunderbird for your email client, a good explanation of the
required setup process is detailed here:
The use of this new Oauth2 is currently operational on the naples.net
Google Workspace, and the use of Oauth2 is fully functional and available
if you want to convert now instead of waiting till Google forces the change.
MDM push of password based IMAP, CalDAV, CardDAV, and POP
will no longer work for existing users.
Admins will need to push a Google Account using their MDM provider,
which will re-add their Google accounts to iOS devices using OAuth.
If you use Google MDM, “Custom push configuration-CalDAV” and
“Custom push configuration-CardDAV” (more details about the settings here)
will stop being effective.
***************************************************
The following below is the older way of setup that is being replaced
by the above red highlighted method and below will be obsolete
by March 14, 2025.
***************************************************
These changes seem to be necessary in order to have
Thunderbird and Outlook be able to connect to the mail server.
Other email client softwares may have the same problem.
IMPORTANT:
Your username everywhere on this Google Workspace system
is NOT just “somename”
it IS “somename@naples.net”
ie, your username on this system is exactly what your
naples.net email address is.
STEP ONE:The Google Workspace system calls any access to mailboxes via client software to be “less secure” and requires 2FA (two factor authentication). After adjusting the following setting, your email client software will be
|
|
| 1) Log in to gmail.com with your full “@naples.net” email address as your username.
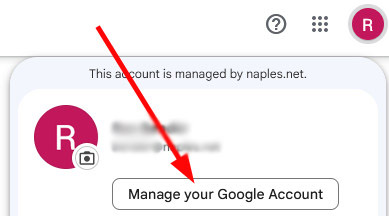
2) Click on your account so that the “Manage your Google Account” shows 3) Click on “Manage your Google Account” |
 |
| On the left side click on “Security” | 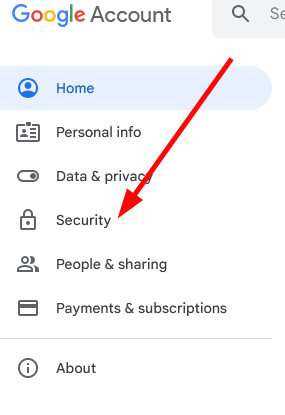 |
| Scroll down the page until you find the “Less secure app access” and click on it and set to ON |

|
| That completes the “less secure” setting adjustment and now the system will allow your email client software to be able to connect to the mail servers. STEP TWO:The following are the settings necessary to allow access to |
|
| Go back to the upper right of the screen and click on the little nine dot icon and then click on the Gmail icon. This will put you back at your webmail interface. | 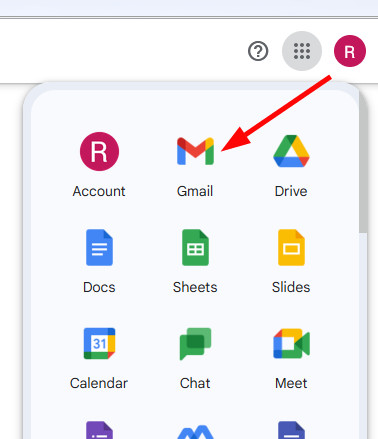 |
| Click on the little gear icon and it will show a “See all settings” button and then click on that. | 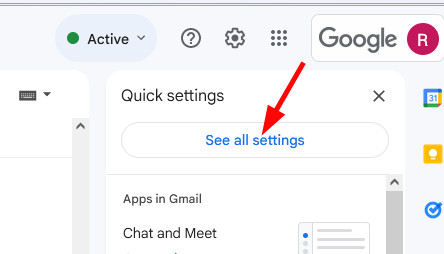 |
| Across the top you will see a row of menu links. Click on the “Forwarding and POP/IMAP link | 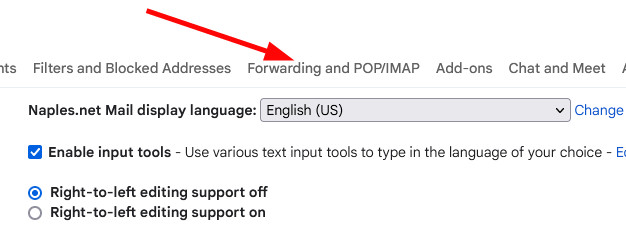 |
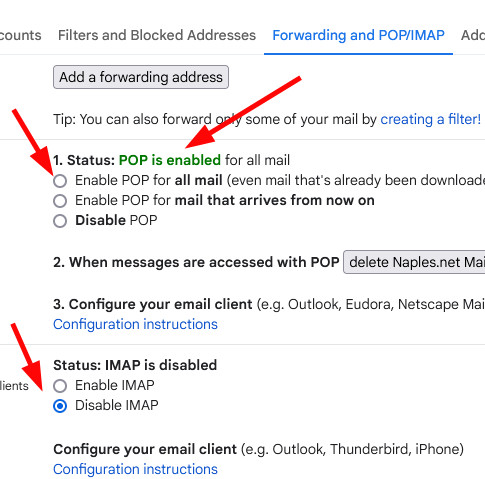
| Here is where you can set the POP or IMAP settings. Your client email software will not be able to connect unless you enable at least one of these. POP is what I choose to use, so I select the “Enable POP for all mail”
Click here to read about the differences between IMAP and POP. MAKE SURE YOU SCROLL DOWN AND CLICK ON “Save Changes” |
 |
|
The following are the settings you will need to enter in to your Use the POP or IMAP settings depending on what |
|
| Client Software settings……
POP and IMAP are simply two different ways of connecting to the mailbox for RECEIVING email. Details about this are here. SMTP is the way your client email program connects to the serverto SEND email. |
Incoming Mail (POP) Server
Outgoing Mail (SMTP) Server
|
contact NFN Administration here
for additional information.
Go back to the Naples Free-Net home page